
How Long Does It Take to Build a PC?

PC components and chassis have many variables that contribute to or detract from their difficulty, especially for beginners new to PC gaming. Understanding and repetition make most PC builds with parts from third-party manufacturers easy to assemble.
Building a gaming PC can take 1 hour to 1 1/2 hours for an experienced assembler, based on the complexity of the build. The highest-end configurations can take between 3 to 4 hours if custom hard tubing is involved, as some custom loop bends require careful measurement and trial and error.
One to a few hours is a significant range for building a computer. This article narrows down the part type and what often goes into the basic PC building process.
Table of Contents
- Time Breakdown of Building a PC
- Unboxing and Prep Work:<10 Minutes
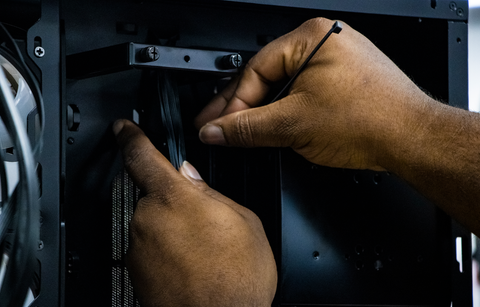
- Motherboard Setup: 10 Minutes (Expert)/25 Minutes (Beginner)
- CPU: <1 Minute (Expert)/2 Minutes (Beginner)
- RAM: 2 Minutes (Expert)/5 Minutes (Beginner)
- Storage: 3 Minutes (Expert)/5 Minutes (Beginner)
- CPU Cooler: 5-10 Minutes (Expert)/10-15 Minutes (Beginner)
- Motherboard Installation: 10 Minutes (Expert)/15 Minutes (Beginner)
- Power Supply Installation: 5 Minutes (Expert)/ 10 Minutes (Beginner)
- GPU Installation: <2 Minutes (Expert)/5 Minutes (Beginner)
- Wire Management: 20 Minutes (Expert)/ 30 Minutes (Beginner)
- Operating System & Driver Installation: 30 Minutes (Expert)/40 Minutes (Beginner)
- Benchmarks & Troubleshooting: 15 Minutes (Expert)/15 Minutes (Beginner)
- Main Factors That Increase Build Time
- Research and Compatibility: Minutes (Minor)/Weeks(Major)
- Part Delivery and Procurement: Days (Minor)/Weeks (Major)
- RMA and Component Testing: Two Weeks (Minor)/1 Month (Major)
- Cooling Systems: 5 Minutes (Minor)
- Part Orientation: 15 Minutes (Minor)/45 Minutes (Major)
- Experience: An Invaluable Amount of Time
- Why Beginners May Consider Buying a Prebuilt First
Time Breakdown of Building a New Computer
- Unboxing all the components: <10 minutes
- Preparing Case: <5 minutes
- Motherboard, Storage, CPU, Cooler, and RAM: 10 Minutes (Expert)/25 Minutes (Beginner)
- Installation of the Motherboard and PSU: 15 Minutes (Expert)/25 Minutes (Beginner)
- Fan/Radiator installation: 20 Minutes (Expert)/30 Minutes (Beginner)
- GPU installation: <5 Minutes
- Wire Management: 20 Minutes (Expert)/30-40 Minutes (Beginner)
Total Time for Experienced builders: 1:10-1:25 Hours
Total Time for Beginner builders: 1:50-2:20 Hours
Time Breakdown for Installing Software- Installing Windows: 20 Minutes
- Driver installation: 10 minutes
Let's look at some preferences contributing to or reducing the overall time to assemble your own PC.
Unboxing and Prep Work:<10 Minutes
Most retail computer hardware boxes have uses outside being places to test components.
When opening a box, check every nook and cranny for baggies containing necessary screws and manuals, as having them when assembling the PC helps reduce build time.
If you are not in the habit of keeping a majority of PC component boxes, I suggest at least keeping the PSU box to store all unnecessary stickers and accessories until you need them.
Motherboard Setup: 10 Minutes (Expert)/25 Minutes (Beginner)

CPU: <1 Minute (Expert)/2 Minutes (Beginner)
The CPU is one of the most straightforward installations while being one of the riskiest. Depending on having Ryzen or Intel, both CPUs require correct placement and seating for the PC to function and to ensure no damage occurs.
Both Ryzen and Intel use either PGA (Pin Grid Array) or LGA (Land Grid Array) that rely on proper placement and leverage for their retention arm in securing the CPU to the motherboard.
RAM: 2 Minutes (Expert)/5 Minutes (Beginner)
A distinguishing factor for RAM is the type and orientation. Every motherboard has the same retention lock style with one or two locks on the RAM slots. Hearing not one but two clicks ensures the particular RAM stick is ready for gaming.

Storage: 3 Minutes (Expert)/5 Minutes (Beginner)
The best storage for installation and performance is NVMEs. Due to easy installation and small form factors, they are desirable for most systems looking for fast storage at a marginally higher price. Conventional SSDs and Hard Drives take slightly longer to install due to their screw mounts or rail retention system.
NVMEs, for example, are tricky due to their insertion method at an angle along with the retention screw. Most NVME panels on the motherboard also have a thermal pad for added cooling that fit snug on the NVME.

CPU Cooler: 5-10 Minutes (Expert)/10-15 Minutes (Beginner)
The CPU cooler is commonly an AIO (All in One) Radiator or a Heatsink. An AIO is slightly more time-consuming to install because its cooler comprises a radiator with a mounting hole for the case and fans. Heatsinks are less so with their direct mount to the CPU, and single or double fans mounted to the aluminum fins. The performance differences between the two rely heavily on variables such as airflow and maintenance. However, heatsinks are easier to install and maintain.
Motherboard Installation: 10 Minutes (Expert)/15 Minutes (Beginner)
Installation of the motherboard and its attached components varies depending on the case clearance. For most cases, standoffs for the motherboard are in an ATX configuration. Changing the configuration is as simple as undoing the motherboard standoffs and lining them up with MATX or ITX holes on the chassis. (Make sure to check under the NVME covers as some manufacturers cover the middle standoff screw with a shield)
The important thing is to remember and properly mount the IO shield and avoid the metal support boys from getting into the HDMI, Type C, VGA, or any other connection.
Power Supply Installation: 5 Minutes (Expert)/ 10 Minutes (Beginner)
The PSU accounts for the majority of wires in a system. Cases differ in the amount of room given to the PSU; the more wattage, the more elongated the PSU tends to become. Installing the PSU with chassis mounting screws may be easy, but tucking all necessary wires may be complicated.
With additions like cable extensions and or RGB strimmers, the lack of space becomes apparent depending on the configuration.

GPU Installation: <2 Minutes (Expert)/5 Minutes (Beginner)
The easiest and often last part of PC part installation is the graphics card or GPU. This is where most cases highlight their accommodation for small and larger components like the GPU. If there is uncertainty on whether a component fits, go to the manufacturer's site for the supported dimensions.
Wire Management: 20 Minutes (Expert)/ 30 Minutes (Beginner)
Managing the cables and accessories in the back of the case takes time. Depending on the case brand and the accommodation for tie-downs, cable routers, and other factors.
Of course, going for the “out of sight, out of mind” approach by not bothering with all of the cable management by shoving the back panel is a viable solution to save time. This may work in some cases, but others depend on the back panel for airflow.
For the best approach to proper cable management, get zip ties or Velcro® straps and secure the 24 Pin PSU, the CPU connection, fan, front IO, and any accessories on the left side of the back panel. Folding unused PSU connections in the pocket is also an efficient way to save space.
Operating System & Driver Installation: 30 Minutes (Expert)/40 Minutes (Beginner)
Congrats! Now comes the part for every new PC set up. The most popular OS for gaming is Windows 10 Home. After the initial setup, programs like Driver Booster are great for getting most drivers on the system.
Benchmarks & Troubleshooting: 15 Minutes (Expert)/15 Minutes (Beginner)
If you are a super nerd when it comes to seeing the results of the newer system compared to older ones, benchmarks may just be for you. Benchmarks show the performance of any given computer that runs them and often compare their score to the computers of yesteryear.
Benchmarks like Unienegine Superposition, Heaven Benchmark, 3D Mark, and others are great for testing a component's ability to perform and spot any issues with system stability.
Main Factors That Increase Build Time
While being a beginner doesn’t speed up the build time in any PC, common mistakes may set you back a few minutes to days at a time. What's more, there are several factors which contribute to the length of time it takes to build a new PC. Here are some common issues people new to building PCs may run into.
Research and Compatibility: Minutes (Minor)/Weeks(Major)
First-time builders will often be super excited and nervous to build their first PCs. In this rush of picking out parts, it's best to do your due diligence. Sites like PC Part Picker are great ways to see the most compatible components and notice any incompatibilities immediately.
The worst feeling is ordering incompatible parts only to find out when the building process starts.
Part Delivery and Procurement: Days (Minor)/Weeks (Major)
Sites like Newegg, Amazon, B&H, and other distributors work through multiple logistic carriers, and ordering all at once can lead to time between parts coming in.
At the best of times, everything comes within a few days of each other but depending on the inventory, procurement and delivery can sometimes take weeks.
RMA and Component Testing: Two Weeks (Minor)/1 Month (Major)
After receiving all parts, it is best to test them on top of the motherboard box to see if all of the components POST(Power On Self Test) the system. Troubleshooting is the next step if the PC does not POST and an error appears on the motherboard.
If a defective part is the cause, sending it to the manufacturer is the best bet through an RMA (Return to Merchandise Authorization) process. Many manufacturers have a method for authorizing returns that is an option on the manufacturer site.
While most companies are great at sending replacements, the limited stock often takes longer to ship, especially if a defective part goes through testing on the manufacturers' end.
Cooling Systems: 5 Minutes (Minor)
One of the most challenging components to mount is the heatsink or the AIO for a beginner. A substantial amount of coordination is needed to put the cooler on promptly and properly.
Not putting the cooler on directly interferes with the thermal paste spread and affects CPU cooling.
Part Orientation: 15 Minutes (Minor)/45 Minutes (Major)
For the best performance, orientation is essential for fans, power supplies, and general case configuration.
Fan direction is significant for factors like airflow and temperatures. In addition, internal PSU fans oriented the wrong way choke on the hot air generated by components.
Proper airflow can be incredibly taxing if most components face the wrong way and require some rewire management.
Experience: An Invaluable Amount of Time
Overall the speed at which components become installed and secured is up to the builder. Establishing muscle memory for how things feel and sound together contributes to the time spent assembling.
The best way to practice getting comfortable with PC components is through disassembly, reassembly, and routine maintenance.

Why Beginners May Consider Buying a Prebuilt First
Buying a prebuilt is a great way to get into PC modification. A pre-configured system like a gaming prebuilt PC gives people the confidence to narrow down small changes and eventually morph into a custom built gaming PC.
Apex offers compatible parts with a wide range of parts, including interchangeable AIOs, PSUs, RAM. and other components for future upgrading. Along with compatible components, our QC personnel constantly optimize our prebuilt gaming configurations for the best possible performance.
We also host many cases and parts in our custom builder for the most significant customization, including the latest 3090ti from Nvidia. Whatever your PC building needs, we hope to fulfill them at Apex!
Written by William Wilson
Photo Credits: Pavan Bhakta
Edited 8/2/2023
thanks for the information.
Leave a comment